
I am going to give you some tips and secrets
on how to make ready made panels look like custom.
But first I want to show off some window treatments
I made several years back.
These are silk London Shades in an over sized
window pane plaid pattern of black and white.
These shades have clear crystal trimming and
were lined and interlined, then board mounted.

They dress the windows in my client's dining room of an old Victorian.
Two narrow windows on the ends bookend a pair of bigger single windows.
I made these for her over 5 years ago and didn't take pictures,
because back then, I rarely took pictures of anything other than my kids.

There are built in iron baseboard heaters running underneath the windows,
so the London Shades were a great choice.
Look at the amazing chandelier that is hanging over the table~
at the time I had never seen anything quite like it.
I was floored by how cool and dramatic yet simple and lovely it was~

I got to revisit the house and take these pics to add to my online portfolio
as my client called me, needing some help with a window treatment dilemma.

Before we get into the dilemma part of my visit,
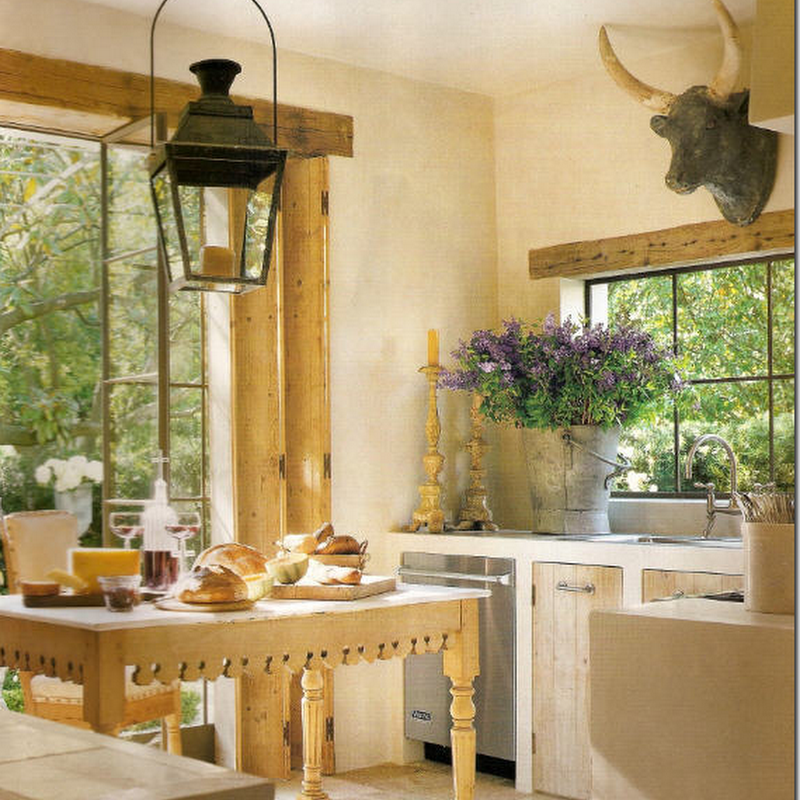
I wanted to take pics of the kitchen treatments I designed for her as well.
I love the color palette of yellow and grey.
This treatment is still one of my favorites
because you get to use two fabrics that play off of each other.
One has the starring role, the other a supporting role.
I like to add a small scale tassel trim to
highlight the shape of the swooping lines.

It is a casual valance well suited to this type of room,
or a hallway or powder room.

You can make the tails be as long as you want.
These were done in a yummy silk check with grey and yellow.

A built in banquette echoes the color in its upholstery and toss pillows.

A coordinating treatment, called a stage coach valance, fits above the sink.

The plaid fabric and the yellow solid roll up around a
drapery tube inside and the treatment is held in place with fabric ties.

Now we are at the dilemma part,
which is also the "window treatment secrets" part.
This is a family room that has
ready made panels from Restoration Hardware.
My client figured she could get her hubby to
hang these panels and she would be happy.
Well she wasn't happy with how they were looking
so she called me to get some help.
I have many clients who use ready made panels,
and the number one secret is: IRON the panels before you hang them.

These are right out of the bag, all creased and wrinkly.
The other thing that needs to be done
with ready mades to get a custom look
is you have to "dress" and then "train" them after you hang them.

There are some creases that are factory set.
The factory irons them in half before they package them
and it they are a bear to remove.

Set up the ironing board and get a spray bottle.
Start with the panel all in the front at your feet and
as you iron each section push it over towards the
back until you have finished the panel.
I used the spray bottle for deep set creases,
first testing in an area that is inconspicuous.
These panels are silk, and they took to the iron and spray like a duck to water~
I normally have no problems steaming silk panels on a high heat setting.

The first window is completed.
The panel on the right has been dressed~
that means I created uniform folds from the top down to the bottom.
Having a large stripe helped with this process as it is a built in line of where to make your folds.
The panel to the left is dressed and now being "trained".
It is tied off in two sections to set the folds and create a memory.
If you have pinch pleated panels,
it is easier because you are just going to follow the pleated fold.

I used kite string to make a gentle loop around the panel,
not wanting to create more creases.

I tied it near the top and at the bottom.

Now this panel has proper folds and is a big improvement
over the panels that were just hung up out of the box.
The other trick I use is to put a small straight pin
on the leading edge of the rod pocket so it will not slide
forward on the rod too far into the window.
So those are some tips for you when you are using ready-mades
and want a custom look for your window treatments!


No comments:
Post a Comment